
An indoor growing system gives you absolute control over the growing conditions of your crops, allowing for year-round yields in any climate.
But if you don’t maintain optimal conditions, you can stunt the growth of your plants. Or worse, kill them.
That’s why it’s crucially important you nail your grow room ventilation.
An outdoor plant is constantly exposed to breezes and fresh air, a luxury unavailable to your indoor plant.
It’s up to you to provide the ventilation required for big growth and huge yields.
Not sure how to set up your grow room?
Don’t work up a sweat. Indoor grow room ventilation can be tricky, but you’ll quickly get a grasp of things once you understand the basics.
In this guide, I’ll cover 3 aspects of grow room ventilation:
- Importance of grow room ventilation
- How to ventilate your grow room (plus essential gear)
- Frequently asked questions
Let’s start at the top.
5 Reasons Why Grow Room Ventilation Is Vitally Important
There are 5 reasons why your grow room requires an efficient ventilation system.
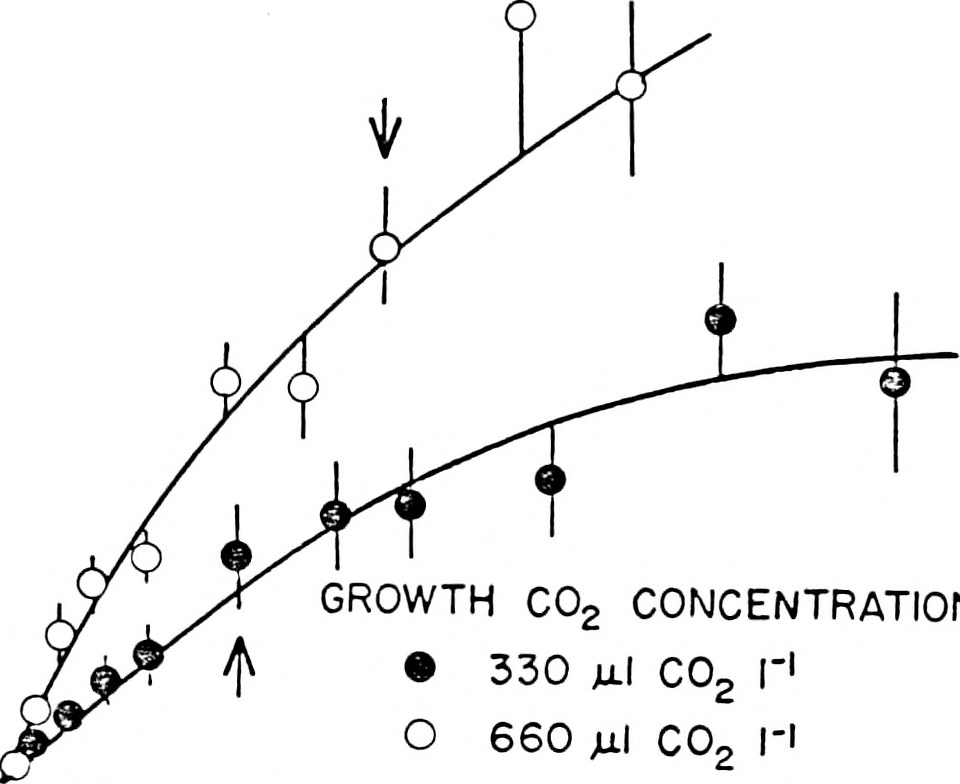
1. Controls CO2
We all know plants take up CO2 (carbon dioxide) during photosynthesis.
If your system doesn’t have a ventilation system in place, CO2 levels your grow room will gradually decrease, limiting a crucial reactant for your plant’s growth.
Adequate ventilation draws in fresh CO2 dioxide from outside the growing environment and removes stale air, boosting the yield and growth of your plant.
2. Controls humidity
Plants emit water vapor throughout the day due to transpiration, a process where the plant “sweats” water through its leaves. This increases the humidity of your grow room.
Wet and humid air can trick the plant into thinking it’s been watered, halting both transpiration and the uptake of water and nutrients from its roots. If not corrected, this can cause several problems for your plant and sometimes even kill it.
An efficient ventilation system wicks away some of the water released in the transpiration process. The plant then absorbs more water and nutrients from its roots, resulting in better growth.
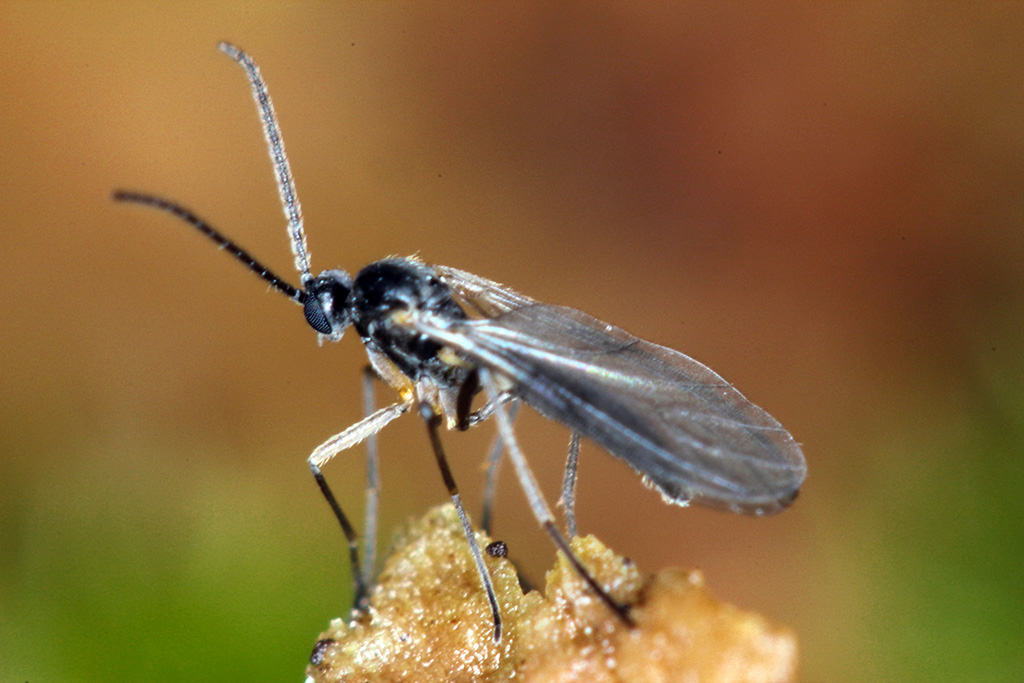
3. Prevents disease and pests
Pests and microorganisms love stagnant, humid environments. Fungus gnats, spider mites, powdery mildew, mold — you name it, they love humid growing conditions.
Damp topsoil is a favored nesting spot for pests. Proper air circulation can reduce the overall humidity in your growing area and dry the surface soil, disrupting any reproduction attempt by pests.
Worried pests can sneak in through the ventilation system? That’s a genuine but avoidable concern that I’ll get into below.
4. Removes heat
See those grow lights in your grow area? They emit heat. A lot of it.
Yes, even those lower-heat LED lights.
It may not look like much, but a few degrees of increase can mean the difference between a good yield and an unsuccessful yield.
Some types of grow lights (think, MH and HPS lights) emit more heat, but regardless of the type of light used, you can’t ignore the heat they produce.
5. Controls odor
Combining a carbon filter with a ventilation system can help eliminate unwanted odors. The two are crucial if you are looking to keep things discreet and under wraps.
6 Pieces of Gear You Need to Ventilate Your Grow Space
There are 6 components required for a functioning ventilation system:
- Oscillating fan
- Exhaust fan
- Passive and active intake fan
- Humidifier/dehumidifier
- Duct tubes
- Carbon filter
1. Oscillating fan
An oscillating fan distributes air around the grow space.
These fans continuously rotate and are able to blow air towards all of the plants in your growing environment.
Since an oscillating fan blows in all angles, it simulates a more natural breeze. This avoids “wind burn” where a handful of plants are repeatedly bombarded with a direct gust of air.
Oscillating fans also assist in keeping the environment cool and minimize sharp changes in humidity and temperature levels and prevent air from layering. If layering is allowed, it’s difficult for carbon dioxide to distribute evenly. In extreme cases, plants might not receive any carbon dioxide.
Oscillating fans are a better fit for a large grow room or grow tent, and you may want to consider adding a couple of oscillating fans that work together to create a variety of wind currents.
Since these fans are easy to move around and set up, you can experiment until you find the best positions for your unique environment.
Choosing the right oscillating fan depends on the flow rate or CFM (cubic feet per minute) of your environment. You should opt for a fan that has a higher CFM than your calculations.
Pro Tip: If your house uses an air conditioner, add it to your calculations. 10,000 BTU of air conditioning replaces a 265 CFM fan.
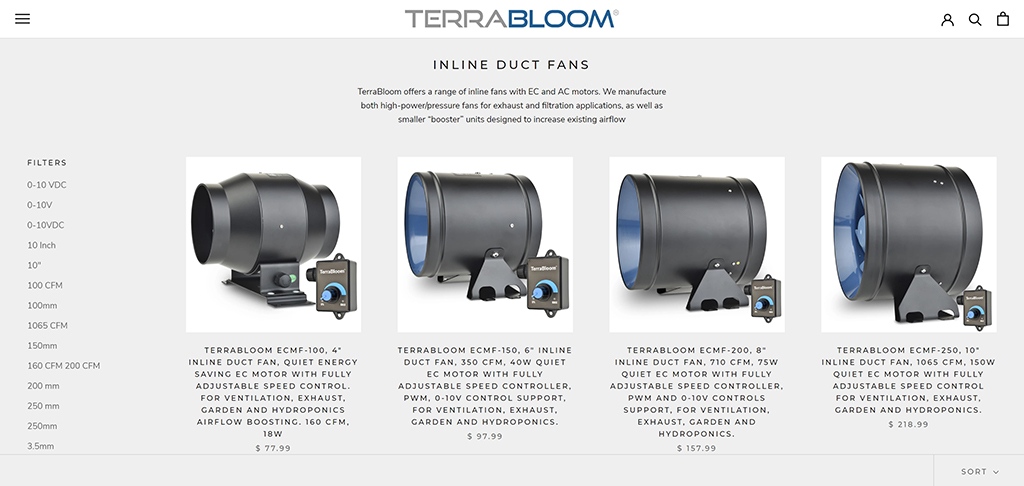
2. Exhaust fan (inline fan)
An exhaust fan removes old air from the growing area. At a minimum, old air must be removed every three minutes, but the recommended limit is every one minute.
Grow rooms sometimes come with an exhaust fan built-in.
A grow tent generally features several flaps and ports where an exhaust fan can be affixed to quickly remove stale air, but it’s recommended you place the exhaust fan at the top of the grow room or tent.
Because hot air rises, a well-placed exhaust fan will be able to easily remove it from your system.
Ducting on the outside will need to connect the exhaust fan to a vent or window where the hot air can be disposed of. For a large setup, add the aforementioned oscillating fans to maintain good airflow.
Similar to an oscillating fan, you must calculate the CFM before purchasing an exhaust fan. But here, you need to account for additional variables:
- Add 40% for hot and humid regions
- Add 25% for hot and dry regions
- Add 5% for CO2 enrichment
- Add 20% for carbon filters
- Add 10-15% for HID grow lights
3. Passive and active intake fan
This focuses on drawing fresh air into your grow space, and there are two different types of fans: passive and active.
Passive intake fan
A passive intake system uses negative pressure and natural airflow to draw air into your growing environment. This could be as simple as using a hole or vent in the grow space to draw air, similar to opening a window.
If you’re using an inline fan with a passive intake system, the inline fan acts as a vacuum that pulls in fresh air. However, the passive intake vent must be at least twice the size of the exhaust fan to ensures the exhaust system isn’t overworked. It’s best if you utilize several passive intake vents.
This system is common in grow boxes but advanced models feature active intake fans. If you want to go down the DIY route, you could add an intake fan yourself, but it requires a certain level of technical expertise.
Active intake fans
Active intake fans use a fan to pull air into the grow environment, delivering a high level of circulation inside your grow room. Be sure to use a fan with the same CFM and rate of pressure as the exhaust fan to keep things balanced.
Active intake fan systems are more efficient than passive intake systems.
Worried your vents will allow pests to crawl in? An intake filter can prevent both dust and insects from finding their way into your grow area.
4. Humidifier/dehumidifier
Ventilation systems do a fine job balancing humidity, but in some cases, you may need to use a humidifier or dehumidifier to quickly and efficiently control humidity levels.
Though plants constantly produce water vapor through transpiration (and usually you want to remove it to lower the humidity) there are situations where you may need to increase the humidity.
For instance, different growing stages may require different humidity levels. Without a humidifier, you’ll have to seal your grow space or switch off the exhaust system.
Do your research and understand the humidity levels that are best for your plant. You can then use a humidifier or dehumidifier to keep the environment’s humidity level within the required range.
Keep in mind that large plants produce more water vapor, so you must closely monitor humidity levels as your plant grows.
5. Duct tubes
Ducting is attached to your exhaust fan and provides a channel for the old air to be removed. Generally manufactured from aluminum, they’re often multilayered to prevent leakage through tears.
When fitting your ducting, be sure to minimize bends and keep the length as short as possible. More bends and longer ducting mean more work for your fan. Airflow decreases the further it has to travel, so a straight route is much better.
- A 30° angle causes a 20% decrease in airflow
- A 90° angle causes a 60% decrease in airflow
Ideally, the width of your ducting should match the size of the fans (and vice versa) or you’ll need reducers and clamps to make it all fit. Line the ducting straight to an exhaust fan and use duct tape to secure it. Then secure additional ducting through the hole while minimizing any bends.
6. Carbon Filter
If you wish to control any odor from your plant, you can’t go wrong with the trusted trio:
- Carbon filter
- Exhaust fan
- Intake fan
A carbon filter uses a bed of activated carbon to filter gases and remove odor.
Pro Tip: Position the carbon filter at the top of the growing environment for the best performance.
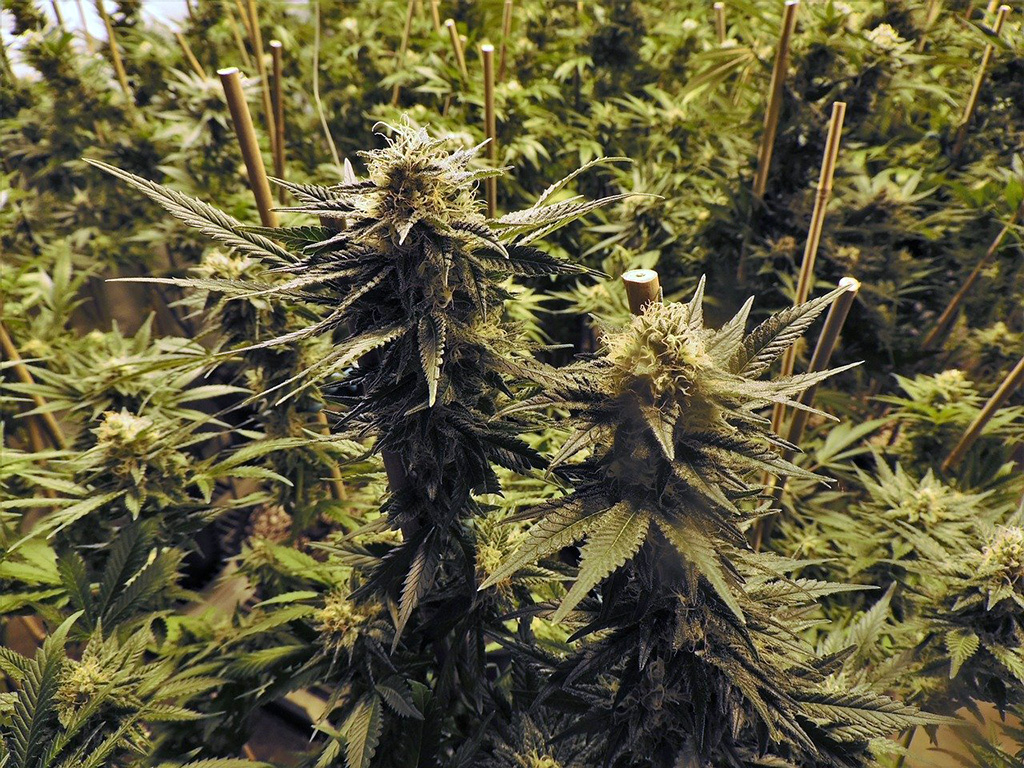
If you’re growing plants with a strong aroma, such as cannabis, a carbon filter is imperative. Other than the odor, carbon filters trap spores and pollen, which keeps the air clean. That’s great news for anyone with respiratory issues or allergies.
Bonus! How to Ventilate a Micro-Grow
For micro-growers with small plants in a cabinet or small grow box, ventilation is a much simpler affair.
A small hole can suffice as long as it has a carbon filter that prevents odor from emitting while keeping out dust and insects.
Without a filter, the exhaust system will blow air into your room, making your room smell like your plants. But that’s not all. The fresh air your intake system pulls in will be the old air your exhaust system was getting rid of!
If you have a grow box, the combination of an exhaust/intake vent with a microfilter should suffice.
Grow Room Ventilation FAQ
Before we call it a day, let’s answer some of the most commonly asked questions about grow room ventilation.
How do I calculate the CFM?
It’s a simple, three-step process.
Step 1: Calculate the volume of the growing environment
Your growing environment’s volume accounts for the 3D space. To calculate the volume, multiply the length, width, and height. You can find this information on the product manual or else you better begin measuring!
Step 2: Calculate the minimum CFM
Exhaust fans are measured in CFM, or cubic feet per minute. Ideally, your ventilation system will exchange air every 1-3 minutes where 1 minute is optimal.
To determine the CFM requirements of your environment, divide the volume you calculated by the number of minutes.
If your grow environment is 8′ x 10′ x 6′, your air volume is 480 cubic feet. To replace the air every 3 minutes, you need a fan with a flow rate of at least 160 CMF but ideally at least 480 CFM.
Step 3: Make adjustments as necessary
The flow rate calculated in Step 2 is just the minimum and probably needs to be adjusted for your environment. Here are some common adjustments:
- Add 40% for hot and humid regions
- Add 25% for hot and dry regions
- Add 5% for CO2 enrichment
- Add 20% for carbon filters
- Add 10-15% for HID grow lights
Don’t forget to include your ducting. Longer ducting and bends require stronger flow rates. For bends, keep these adjustments in mind:
- A 30° angle causes a 20% decrease in airflow
- A 90° angle causes a 60% decrease in airflow
How do I make my ventilation system discreet?
If you have a grow room, it may be a good idea to secure some wicker blinds in front of the window or outlet you’re using for intake air. This way, you can cover up what’s going on inside while allowing air in. You could then drill plywood on the frame with a hole cut out for the ducting.
Pre-assembled grow room kits generally come with a ventilation system, which makes discreet growing simple.
How do I manage the exhaust system noise levels?
If you’re using a fan at its maximum setting, it’s bound to generate noise. You can combat this in a few ways.
For starters, you can purchase fans that prioritize quiet operation.
Second, you should choose a fan with variable speeds and a CFM that’s at least 25% higher than your minimum requirements. This will let you run the fan at a slower speed with no reduction in performance. This is good for your fan’s longevity as well.
Third, soundproofing your system can go a long way in dampening the fan’s hum. Attaching a silencer to your exhaust fan can quieten things down, as will using insulated ducting rather than the standard stuff.
What’s the best fan size?
Fans are generally sized using their diameter.
- 6-inch models are the most common, but you can also find 4-inch and 8-inch fans
- 8-inch fans are favored in large, high-end grow systems
For beginners, a 6-inch fan is recommended. Six inches is the most common duct size, and your fan must be the same size as your duct.
In the same vein, your intake fan and exhaust fan must be the same size, too.
What’s negative pressure?
Negative pressure is a situation where the pressure in the grow environment is less than the pressure in the outside environment.
This is essential if you’re using passive intake where the negative pressure pulls in fresh air from the external environment.
What ducting should I use?
Aluminum ducting is the most common and affordable option. For systems where durability is required, you’ll often find heavy-duty ducting. For noise reduction, insulated ducting is recommended.
Of course (and this can’t be stressed enough) keep duct length to a minimum regardless of your setup. This increases fan efficiency and decreases the power consumed (and your energy bulls).
Grow Room Ventilation: Final Thoughts
A well-implemented ventilation system ensures your plants grow in an optimal setting with carefully-monitored CO2 intake, airflow, temperature, and humidity.
Creating a ventilation system can be complicated when it comes to larger growing environments, but as a beginner, chances are your grow space is on the smaller side so things shouldn’t be too difficult. You could simply implement a passive system.